I’d been using wireless networking at home, and generally this worked fairly well. But a couple of things were problematic. Firstly it would occasionally go out for a few minutes at random (which I ascribed to the neighbor’s wireless phone). Secondly it was rather slow using Media Center Extender for the XBox 360. It seemed to work for streaming regular definition video, but anyhing higher was dodgy, and navigating menus of content (like photos) was painfully slow.
So I decided I’d upgrade from the podunk 54Mb/s to a stunning 1000Mb/s fully switched network.
This meant I had to install six wall sockets. One for the internet connection (in the kitchen, for some odd reason), one for the new switch (in a cupboard, out of the way), and four outlets (3 in the bedrooms, one in the living room for the Xbox. That means I have to lay five Cat5e cables, each one going from the switch to an outlet.
Having never done this before, I was a little uncertain how to go about it. Luckily many have gone before me.
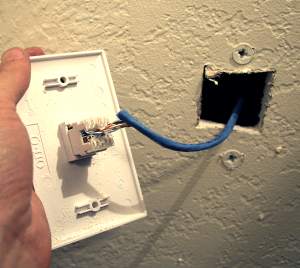
Cutting the holes in the wall was not something I was looking forward to, as patching drywall always seems to go badly for me. I thought at first I’d have to cut large chunks out so I could install junction boxes to the studs. But I eventually figured I could just cut small holes in the wall (see pic), and then mount the faceplate with self-drilling drywall anchors. This worked out really well. Just pre-drill 1/4″ holes for the anchors to avoid crumbling the edges of the hole. It’s pretty solid.
Up in the attic there’s a whole mess of wires. It took me a while to find out the correct spots. I mostly went by existing wiring, and hence my network outlets ended up next to my cable outlets. I drilled 1/2″ holes in the header beams where needed. 1/2″ can take four Cat5e cables (so I needed 2 for the switch).

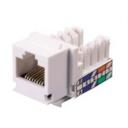
 It took a few hours to get all the cable in place. Then it was simply a case of wiring the sockets. These use a standard “keystone”, which is all color coded, and very easy to wire (just double check it). The sockets come with a little plastic tool to set the wires. You don’t need any special tools, just remove an inch of the blue outer insulation (from the cable, not the wires). Then keep the wires as twisted as possible, and push them into the color coded connectors, and push them down with the tool. (Same color configuration at each end – the keystones have an ‘A’ and ‘B’ config, just use ‘A’ for everything).
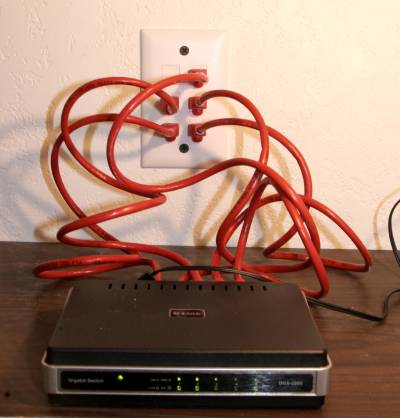
I used a six outlet plate at the switch (five outlets, one cover plate). If you have more you’d use a patch panel, but this looks very neat. One problem was that the hole had to be larger, so the large anchors did not work very well. I used plain 1″ drywall screws, but you could possibly use smaller wall plugs (or actually stick a box in there). When everything was wired up, I hooked up patch cables to all the devices, and the gigabit switch, and turned it on. Everything worked first time. Woo hoo, 80 wires set in place without mistake.
Of course it’s not actually gigabit, since all the devices are actually 100Mb, but the 5-port gigaBIT switch (a D-Link DGS-2205) was only$30 or so. If I get some gigabit devices in the future, then all will be well. The cable runs were pretty short as well (like 25 feet max) so it could probably do 10Gb later.
Results? Well, the internet now no longer goes out. Media center is a lot faster – actually very usable now for browsing through photos. Everything went according to plan. Very odd.
Parts List:
- 150 feet of Cat5e Cable (I got two 100 foot rolls). Measure first.
- 10 RJ-45 keystone sockets
- 5 single outlet keystone wallplates
- 1 six outlet keystone wallplate
- 1 blank cover
- 12 Drywall anchors or drywall screws
- five short patch cables (24″) for the switch
- five long patch cables (7′ to 14′, as needed) for the outlets/devices
- 1 five port gigabit switch (D-Link DGS-2205)
Tools used
- Drywall saw
- Wire setting tool (comes with keystone sockets)
- Drill with long 1/2″ bit for drilling through headers
- Fish tape for pushing/pulling wire, especially through walls with insulation.
- String (sometimes easier to push string through with the fishtape, then pull cable)
- Screwdriver
Took about six hours of work.
